1.项目初始化
前端项目
git clone https://github.com/PanJiaChen/vue-admin-template后端项目
PyCharm中New Project 选择Django
注意:环境要选择django已安装的环境,
pip show django我安装在anaconda
此时,runserver 正常访问 就是成功了
tips: 启动也可以通过debug的方式
数据库创建
编写oAuth/models.py,给settings.py中添加一行
AUTH_USER_MODEL = 'oAuth.NewUser'之后 makemigrations,migrations创建用户
creatuser
验证:使用刚刚创建的用户名和密码可以登陆,证明创建成功。
编写admin.py
web页面出现oAuth 用户管理 可以进行前后端关联操作
2.前后端分离-Ngnix
直接访问Dashboard - Vue Admin Template会报错跨域
此时,我们需要使用nginx进行反向代理。打通前后端
安装完成之后,访问http://localhost:80即可看到Nignx的欢迎页面
代理配置
进入conf/nginx.conf进行配置
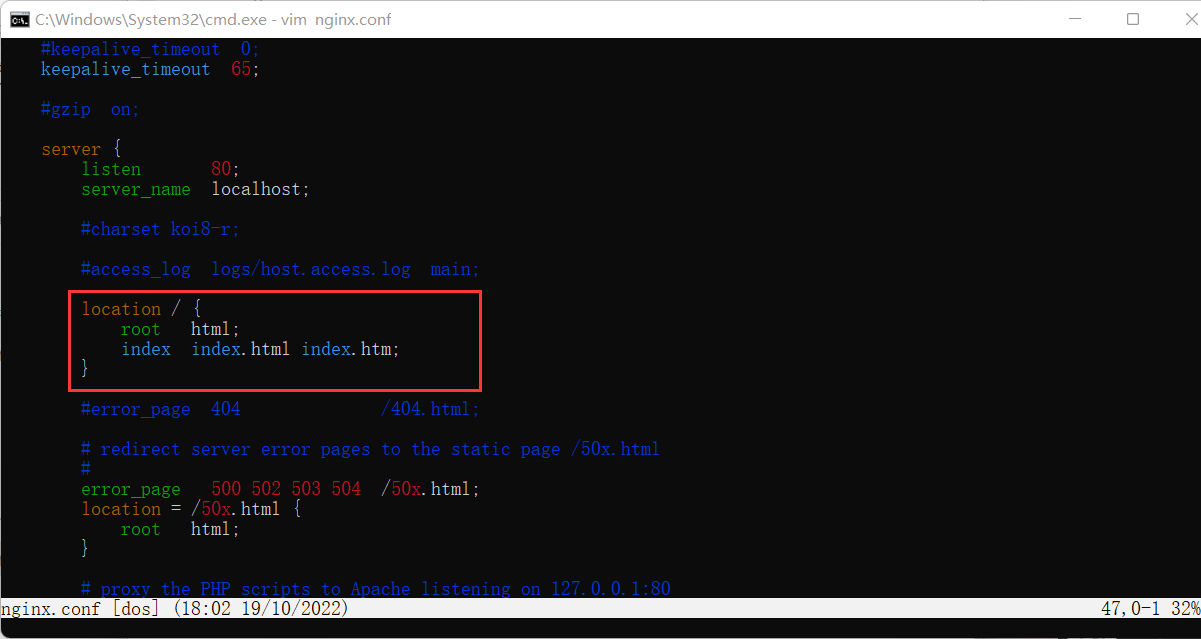
改为:
1
2
3
4
5
6
7
8
9
10
location / {
root html;
index index.html index.htm;
proxy_pass http://127.0.0.1:9528;
}
location /api {
root html;
index index.html index.htm;
proxy_pass http://127.0.0.1:8000;
}/访问到前端地址,/api访问到后端地址
修改完配置之后,执行
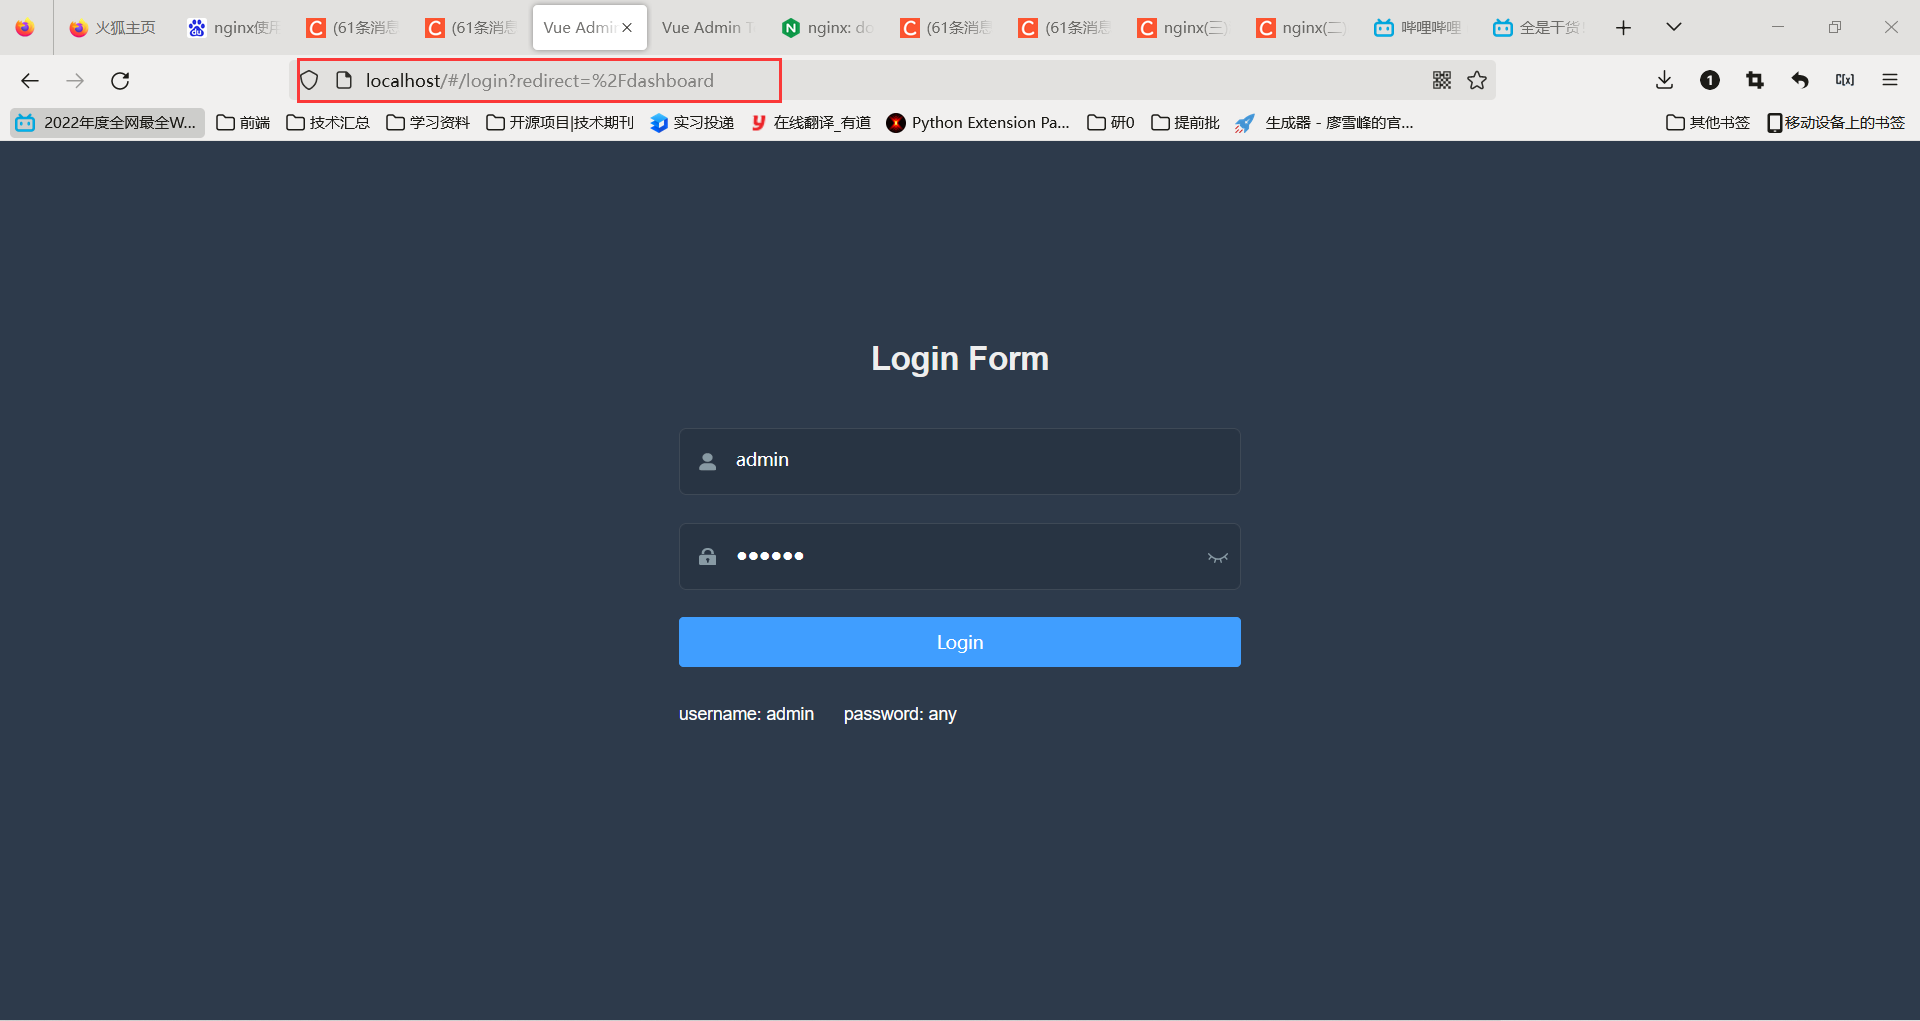
nginx -s reload即可此时,刷新http://localhost:80的页面,访问到的是前端页面。如下:
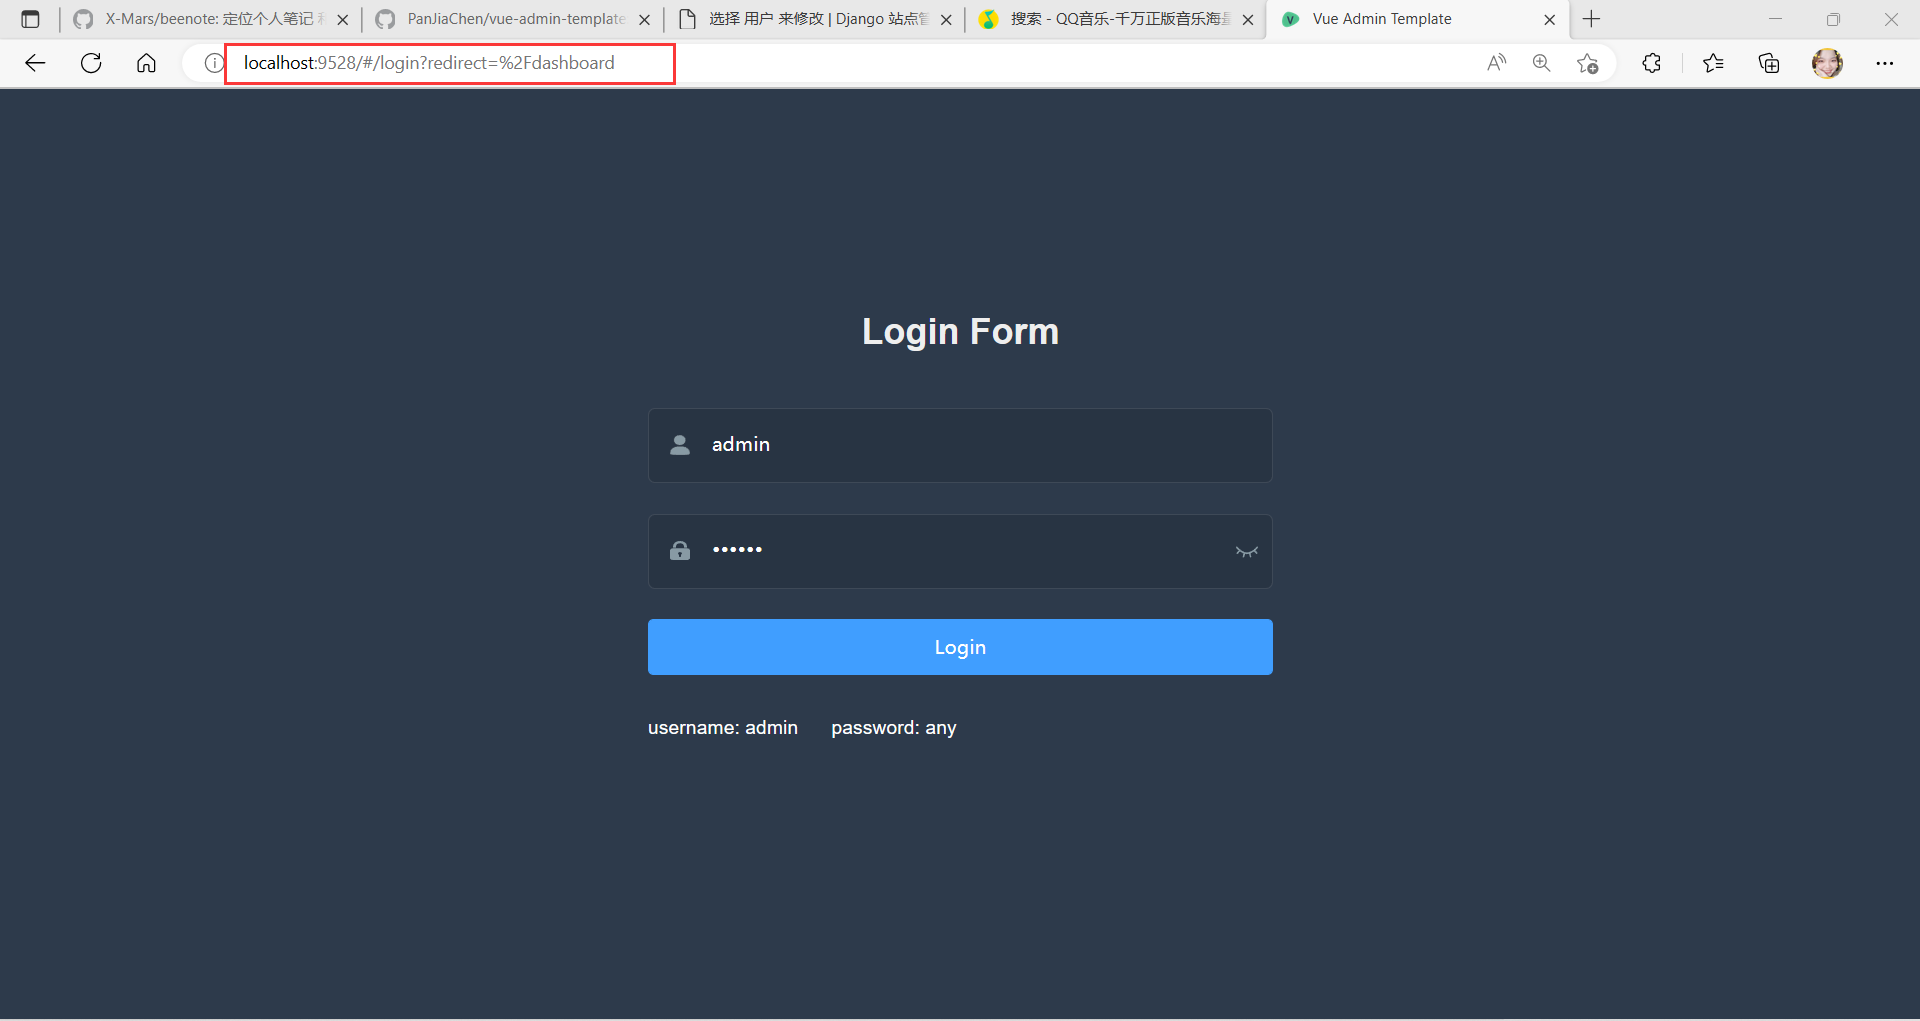
在代理之前,访问前端的地址如下:
3.登录功能
登录逻辑:
- 输入用户名密码 -> 后台返回token -> 前端拿着token,再去后端获取用户信息(role)
- 根据role展示不同的前端页面
实现步骤:
安装django-rest-framework 实现rest api
官网,按照文档install 进行setting.py配置
登录鉴权 用JWT
官网文档install 进行setting.py配置 urls.py引入
引入urls之后,可以通过postman访问api接口
http://localhost:80/api/token/Nginx的根地址输入错误的用户名密码: 返回错误提示
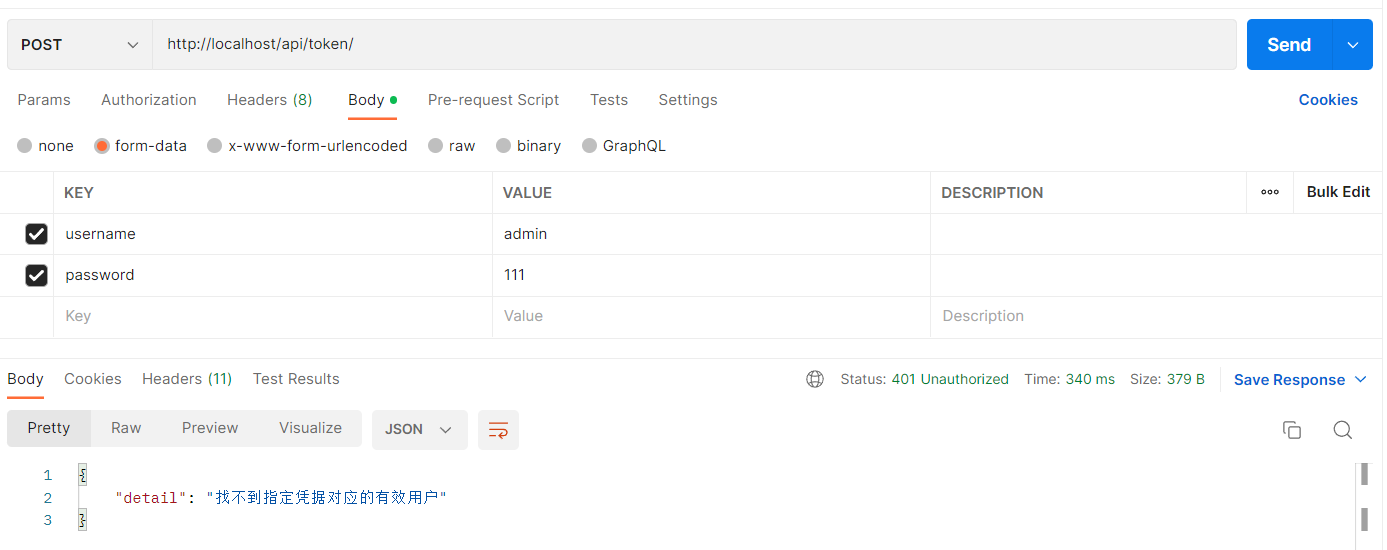
输入正确的用户名密码: 返回token
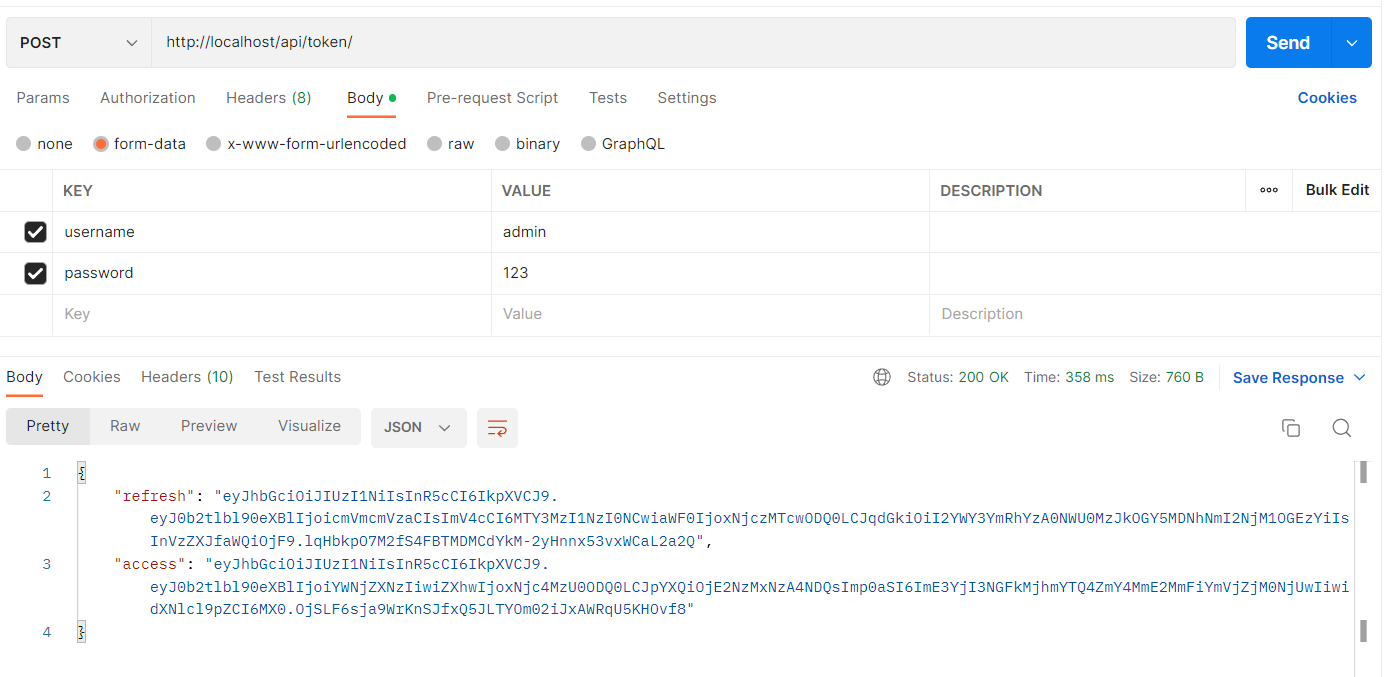
至此,api登录接口好了
登录接口:http://localhost/api/login/ POST {'username': ,'password': } 返回access(即Token)
前端项目中,改登录对应的api地址
访问localhost:80 即通过nginx代理的访问地址 即可进行登录
django-rest-framework的一些用法
mapGetters辅助函数仅仅是将 store 中的 getter 映射到局部计算属性
获取用户信息:views.py 中添加UserInfoViewSet类 urls.py 添加router_V1 ‘info’ 到 UserInfoViewSet
获取用户信息接口:http://localhost/api/info/ GET 传TOKEN
4.展示所有用户的页面
序列化 serializers
对照django-rest-framework文档 添加 views.py urls.py
获取所有用户信息:http://localhost/api/users/ GET 返回所有用户信息新建用户:http://localhost/api/users/ POST {'username': }前端项目写vue进行展示,老本行了
5.Rest api
RESTful API 设计指南 - 阮一峰的网络日志 (ruanyifeng.com)
在view.py中编写UserViewSet类的list、create、update等方法(直接copy viewsets.ModelViewSet中的 不用手动写)
甚至,如果没有特殊要求(不重写),不需要复制过来。
比如:
1 | class BookViewSet(viewsets.ModelViewSet): |
这样就可以进行GET、POST、CREATE、UPDATE等请求
DELETE改写
数据不能真的被删除,给个标识即可,方便以后找回
原代码:
1
2
3
4
5
6
7def destroy(self, request, *args, **kwargs):
instance = self.get_object()
self.perform_destroy(instance)
return Response(status=status.HTTP_204_NO_CONTENT)
def perform_destroy(self, instance):
instance.delete()改写后:
1
2
3
4
5
6
7
8
9
10
11def destroy(self, request, *args, **kwargs):
instance = self.get_object()
self.perform_destroy(instance)
return Response(status=status.HTTP_204_NO_CONTENT)
def perform_destroy(self, instance):
# 改写后 数据并没有被真的删除 只是is_delete标识为1 进行标记
instance.is_delete = True
print('OK')
instance.save()
# instance.delete()同时,注意,GET方法也需要重写
加上已删除标识的筛选。
self.queryset = self.queryset.filter(~Q(is_delete=True))
6.用户注册
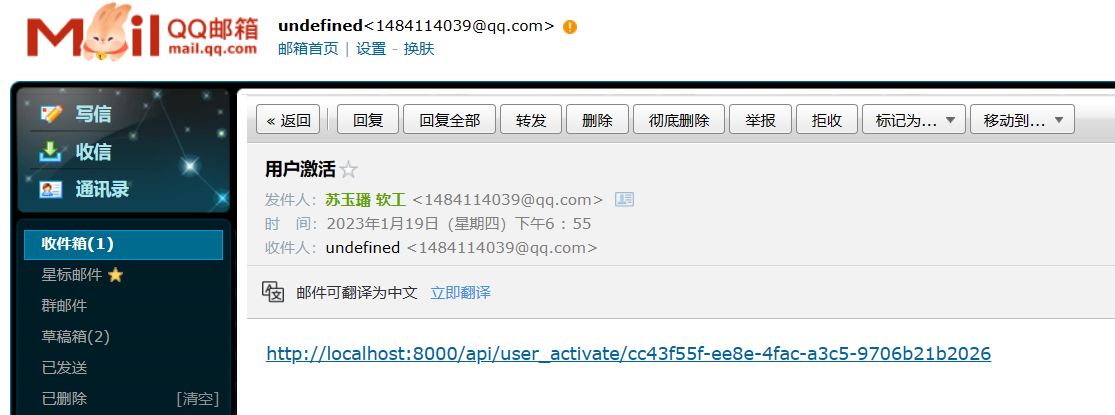
没有验证码页面验证,通过发送邮件到用户邮箱,用户邮箱校验。添加一个字段 is_activate 标识是否检验。
导入UUID包 添加code字段 通过UUID自动生成唯一标识
UUID(Universally Unique identifier) 通用唯一
1
2
3# 在models.py中
import uuid
code = models.UUIDField(verbose_name='uuid', default=uuid.uuid4, editable=False)将UUID拼接URL发送到用户邮箱,用户通过访问该链接进行激活
1
2
3
4
5
6
7
8# 在views.py中
def create():
user_info = self.perform_create(serializer)
user_info.set_password(request.data['password']) # 设置密码
user_info.is_active = False
user_info.save()
code = user_info.code
url = 'http://localhost:8000/api/user_activate/' + str(code)
url拼接好了,但是如果访问会报404,因为urls.py中并没有配置/users/activate接口。并且用户的is_active是False 即不是有效用户,需要激活。
设置urls接口,改写retrieve方法,在方法中将is_active设置为true
1
2
3
4
5
6
7
8
9
10
11
def retrieve(self, request, *args, **kwargs):
# 默认是查询 id 的用户信息,比如/api/users/1
#-------------------------
# 重写为访问带UUID的URL 激活用户状态
instance = NewUser.objects.get(code=kwargs['pk'])
instance.is_active = True
instance.save()
data = {
'status': "success"
}
return Response(data, status=status.HTTP_200_OK)注意:retrieve应该绕过token验证,这里demo没有写
发送邮件
在setting中进行配置
1
2
3
4
5EMAIL_BACKEND = 'django.core.mail.backends.smtp.EmailBackend'
EMAIL_HOST = 'smtp.qq.com'
EMAIL_PORT = 25
EMAIL_HOST_USER = '1484114039@qq.com'
EMAIL_HOST_PASSWORD = 'STMP授权码' # 通过邮箱设置来获取在views.py中引入send_email
1
2
3
4
5
6
7
8from django.core.mail import send_mail
send_mail(
'用户激活',
url,
'1484114039@qq.com',
[user_info.email],
fail_silently=False
)
优化:
后端发送到邮箱的url设置为
http://localhost/#/user_activate?code=3e86dd29-77f4-4989-bb87-6dd417bb9a2e这样访问链接可以跳转到前端对应的
/user_activate在这个前端mounted的时候调
'/user_activate/' + code.code + '/'的接口,进行激活 激活完成之后 自动跳转到this.$router.push('/login')进行登录页面